
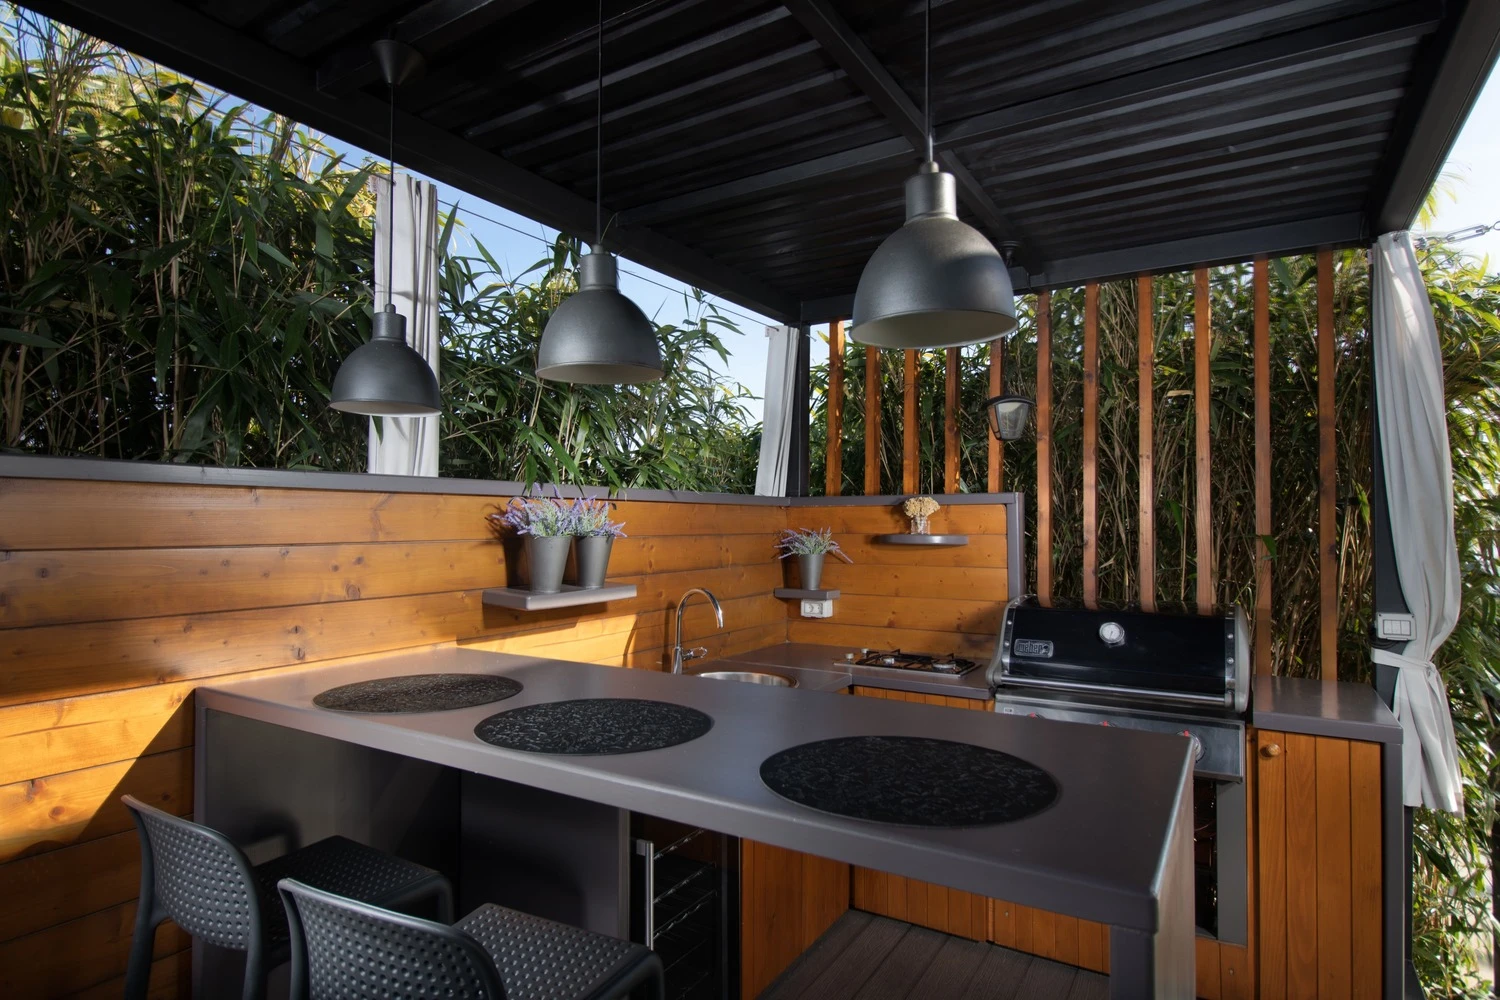
LED Lighting for Outdoor Kitchens & BBQ Areas | Guide
So you've got an outdoor kitchen. Maybe it's a full setup with a built-in grill, sink, and bar seating. Or maybe it's just a solid BBQ station on the deck. Either way, here's the thing nobody tells you: once the sun goes down, bad lighting can ruin the whole experience.
I'm not talking about making things look pretty (though that matters too). I'm talking about being able to actually see what you're cooking, not tripping over steps, finding the spatula you dropped, and still wanting to hang out there after dinner.
The problem is that most people just slap a bright light over the patio and call it done. That's like using a floodlight to read a book. Technically it works, but it's uncomfortable, and you're probably casting a shadow right where you need to see.
Here's how to think about it instead.
Stop Thinking "One Big Light" – Think Layers
The biggest mistake I see? One overhead fixture trying to do everything. It lights up the whole area, sure, but it also creates harsh shadows exactly where you're trying to flip burgers or chop vegetables.
What actually works is layering different types of light:
Task lighting – This is for seeing what you're doing. Grills, countertops, prep areas, sinks. Focused, bright, aimed right at the work surface.
Ambient lighting – This is the comfortable, overall glow that lets people move around and hang out without feeling like they're in an operating room.
Accent and safety lighting – Steps, deck edges, pathways. The stuff that keeps people from wiping out in the dark.
When you layer these, you can keep each one at a reasonable brightness. No need to blast the whole patio with light just so you can see the grill.
Location Ratings Matter More Than You Think
Before you even look at style or brightness, figure out where each fixture is actually going.
"Under a roof" doesn't automatically mean "safe from moisture." Humid air, condensation, splashing from the sink or grill these things matter.
The UL system breaks it down like this:
- Dry location – No moisture. Indoors, basically.
- Damp location – Protected from direct rain but exposed to humidity or condensation. A covered patio often counts as damp.
- Wet location – Direct exposure to rain, splashing, or water flow. Think exposed deck edges or anything near a grill that gets hosed down.
Here's the kicker: a fancy metal fixture that looks rugged isn't automatically outdoor-rated. Check the actual product listing. Look for "wet location" or "damp location" on the label. If it just says "dry," keep it inside.
The Grill Needs Its Own Light
This is where most setups fail.
When you're grilling at night, you're trying to judge doneness, spot flare-ups, read a thermometer, grab tools, and tell cooked food from raw. General patio lighting from behind you? It makes things worse because your body blocks the light and casts a shadow right across the cooking surface.
What you need is a dedicated, adjustable grill light that aims directly at the grate.
Something like the Focus Deck Mount Angled Bullet LED BBQ Light is built for this. It's got a 12-inch rigid stem plus a 16-inch flexible arm so you can position the head right over the work area. Stainless steel construction, tempered glass, high-temp silicone O-ring, weather-protected switch. Comes in 12V or 120V with a 7W LED.
The point isn't to make the whole patio brighter. It's to put good light exactly where you need it on the food without blinding everyone sitting at the table.
Placement tip: Angle the light so it reaches the grate without shining into your eyes. And check that it still works when the grill lid is open. A fixture that's perfect with the lid down might get blocked once you start cooking.
Under-Cabinet Lighting for Prep Areas
Counters under cabinets get surprisingly dark at night. Under-cabinet lighting fixes that.
Low-profile LED fixtures can light up the worktop without being visible themselves.
But this is important: don't assume any puck light works outside. For example, the American Lighting MVP 3 Puck Light Kit is a nice compact system. It offers 2700K or 3000K, 90+ CRI, adjustable swivel, surface or recessed mounting, dimming, and only 4.3W per puck.
Sounds great, right?
It's rated for dry locations only. Not damp, not wet. So it's fine for indoor spaces or maybe a fully protected transition area, but don't stick it under an exterior cabinet just because there's a roof above it.
For actual outdoor cabinets exposed to humidity, you need something specifically rated for that environment.
Pay Attention to CRI (Especially Around Food)
CRI stands for Color Rendering Index. It's a measure of how natural colors look under a light source.
This matters more than people realize in an outdoor kitchen. You want food to look appetizing, sure. But you also want to accurately judge ingredients and monitor cooking.
For task lighting around food, aim for CRI 90 or higher.
The American Lighting MVP system, for instance, is rated at 90+ CRI. That's the kind of color quality you want for food prep, even though that particular product is dry-location rated.
Go Warm, Not Cold
Nobody wants their backyard to feel like a hospital parking lot.
For most residential outdoor kitchens, 2700K to 3000K hits the sweet spot between atmosphere and visibility.
- 2700K – Warmer, softer. Great for dining and lounge areas.
- 3000K – Slightly crisper. Good for grills and prep counters while still feeling comfortable.
There's another reason to avoid cool blue light outside. DarkSky International recommends outdoor lighting at 3000K or lower. They also push for warmer sources, careful aiming, and lower light levels to reduce glare and light trespass.
Stick with one color temperature throughout the kitchen, deck, and surrounding landscape. It'll look intentional instead of like a patchwork of random fixtures.
More Lumens Doesn't Mean Better
Brightness should match the job.
- A grill needs concentrated light.
- A countertop needs even task illumination.
- A pathway needs just enough to see where you're walking.
If every fixture is blindingly bright, you get glare and discomfort, not better visibility.
DarkSky recommends directing light only where it's needed and limiting unnecessary brightness. Their residential guidance also encourages shielded fixtures, warm color temperatures, and controls like timers or sensors.
The better approach? Distribute smaller amounts of light intelligently. You'll see better and feel better.
Deck Lighting: Safety and Subtle Guidance
Good deck lighting isn't about making everything bright. It's about showing people where to go.
Steps and level changes deserve special attention. Low-mounted step lights, under-rail lighting, post lights, and carefully aimed low-level fixtures can define walkways without turning your deck into a stage.
Think of the whole route house to kitchen to grill to dining to garden as one continuous path. Light the transitions.
Low-level deck lighting also pairs beautifully with task lighting. The BBQ station stays bright for cooking while the rest of the deck stays calm and comfortable.
The goal is "show people where to go," not "make everything bright."
Plan Power and Electrical Early
Don't wait until the kitchen is built to think about lighting.
Plan it alongside outlets, appliances, refrigerators, grills, speakers, and charging needs. That way you can hide wiring and put switches, dimmers, and control zones in logical spots.
The American Lighting ATOM 120V AC Power Strip is a good example of a low-profile power management product for under-cabinet and workstation use. It has 20A tamper-resistant receptacles and some sizes include USB-A and USB-C charging.
But you guessed it, American Lighting lists it for indoor dry locations only. So don't treat it as a weather-resistant outdoor power strip. If you're using it near an indoor/outdoor transition, make sure the location genuinely meets dry-location requirements and electrical codes.
For the outdoor kitchen itself, use appropriately rated components. And have permanent line-voltage installations handled by someone who knows local electrical requirements.
Separate Controls = Versatility
Outdoor kitchens become way more useful when lights are divided into zones.
Maybe you want bright grill lighting while cooking, but only subtle deck and dining lighting afterward. Separate controls let you change the mood without flipping every switch at once.
A practical plan might include:
- Separate control for grill/task lighting
- Dimmable ambient lighting
- Independent deck and step lighting
- Under-cabinet lighting controls
- Timers or smart controls for decorative lighting
- Motion sensors for pathways or security
LEDs work great with modern controls, but make sure the fixtures and dimmers are compatible.
The U.S. Department of Energy also notes that dimming, occupancy sensing, and operating lights only when needed can further reduce energy consumption.
Why LEDs Make Sense Outdoors
LEDs are ideal for outdoor kitchens. Low power consumption, long life, flexible designs.
According to the U.S. Department of Energy, today's LEDs use up to 90% less energy and last up to 25 times longer than traditional incandescent bulbs. Quality LEDs often have useful lives measured in tens of thousands of hours.
Low wattage really adds up when you've got multiple task, deck, accent, and pathway fixtures.
But here's the catch: LED technology alone doesn't make a fixture outdoor-safe. The enclosure, electrical components, seals, wiring method, and location rating still need to match the environment.
The Bottom Line
The best outdoor kitchen lighting follows one simple principle: light individual activities instead of trying to illuminate the whole backyard from one source.
Start with the grill and main prep counter. Then figure out what else needs visibility sinks, serving areas, storage, steps, pathways. Add softer ambient lighting for seating and dining. Then restrained accent lighting where it actually improves the design.
Choose fixtures based on real exposure to moisture. Keep color temperatures consistent. Use high-CRI task lights around food. Give important zones independent controls.
When you make these decisions together, lighting becomes part of the architecture instead of an afterthought.
Quick Answers to Common Questions
What's the best lighting for an outdoor kitchen?
Layer it. Task lighting for grill and counters, ambient for dining and general visibility, low-level for steps and pathways. Match fixtures to their actual location rating. Distribute light instead of using one super-bright fixture.
How many lights do I need around a BBQ area?
No universal number. It depends on the size of your station, fixture output, mounting height, beam spread, and nearby prep areas. Start with the grill surface and prep counter. Then add fixtures for seating, pathways, and deck edges. A small setup might need one good task light. A large kitchen might need several independently controlled zones.
Are LEDs suitable for outdoor use?
Yes, when the fixture is rated for the environment. An LED inside a dry-location fixture doesn't become outdoor-rated just because LEDs are durable. Check the complete luminaire for damp or wet location approval.
What works best under outdoor cabinets?
Linear LEDs, tape lights, small downlights, or puck fixtures can all work. For outdoor installations, choose products specifically rated for the moisture level present. Don't substitute dry-location puck lights for properly rated outdoor cabinet lights.
How do you light a BBQ grill at night?
Use a focused task light aimed at the grill surface without shining into your eyes. An adjustable fixture like a deck-mounted or flexible-arm BBQ light works well. The Focus Deck Mount Angled Bullet LED BBQ Light is designed for exactly this: adjustable flex arm, outdoor-oriented construction.
Are outdoor LED lights weather resistant?
They can be, but not all of them are. Look for damp- or wet-location ratings. Wet-location fixtures handle direct water contact. Damp-location products handle moisture and condensation but not direct water. Match the rating to the environment.
What color temperature is best?
2700K to 3000K for most residential outdoor kitchens. Go 2700K for warm, relaxed dining. Go 3000K for grills and prep counters slightly crisper but still comfortable. Staying at or below 3000K also aligns with DarkSky recommendations.
Can LED puck lights go outside?
Only if they're specifically rated for the outdoor conditions where they'll be installed. Don't assume all puck lights work outside. American Lighting's MVP puck lights, for example, are cETLus listed for dry locations. They shouldn't be presented as weatherproof outdoor puck lights. For exposed outdoor cabinetry, choose a damp- or wet-rated alternative.
How much power do outdoor LEDs use?
Depends on the fixture, but LEDs use far less than incandescent for comparable illumination. The Focus BBQ fixture uses a 7W LED. American Lighting lists the MVP puck at 4.3W per puck. The Department of Energy reports modern LEDs use up to 90% less energy than incandescent, which really matters when you've got multiple deck, pathway, task, and accent lights.
What are the best deck lighting options?
Low-level step lighting, post or railing lighting, pathway fixtures, and focused task lights around cooking areas. The goal isn't maximum brightness. It's revealing steps, edges, walkways, seating, and work surfaces while minimizing glare. Warm, downward-directed lighting with separate dimming or control zones keeps things safe and relaxed.


