
How Far Apart Should Landscape Lights Be? A Practical Guide to Path, Step, Deck, and Uplight Spacing
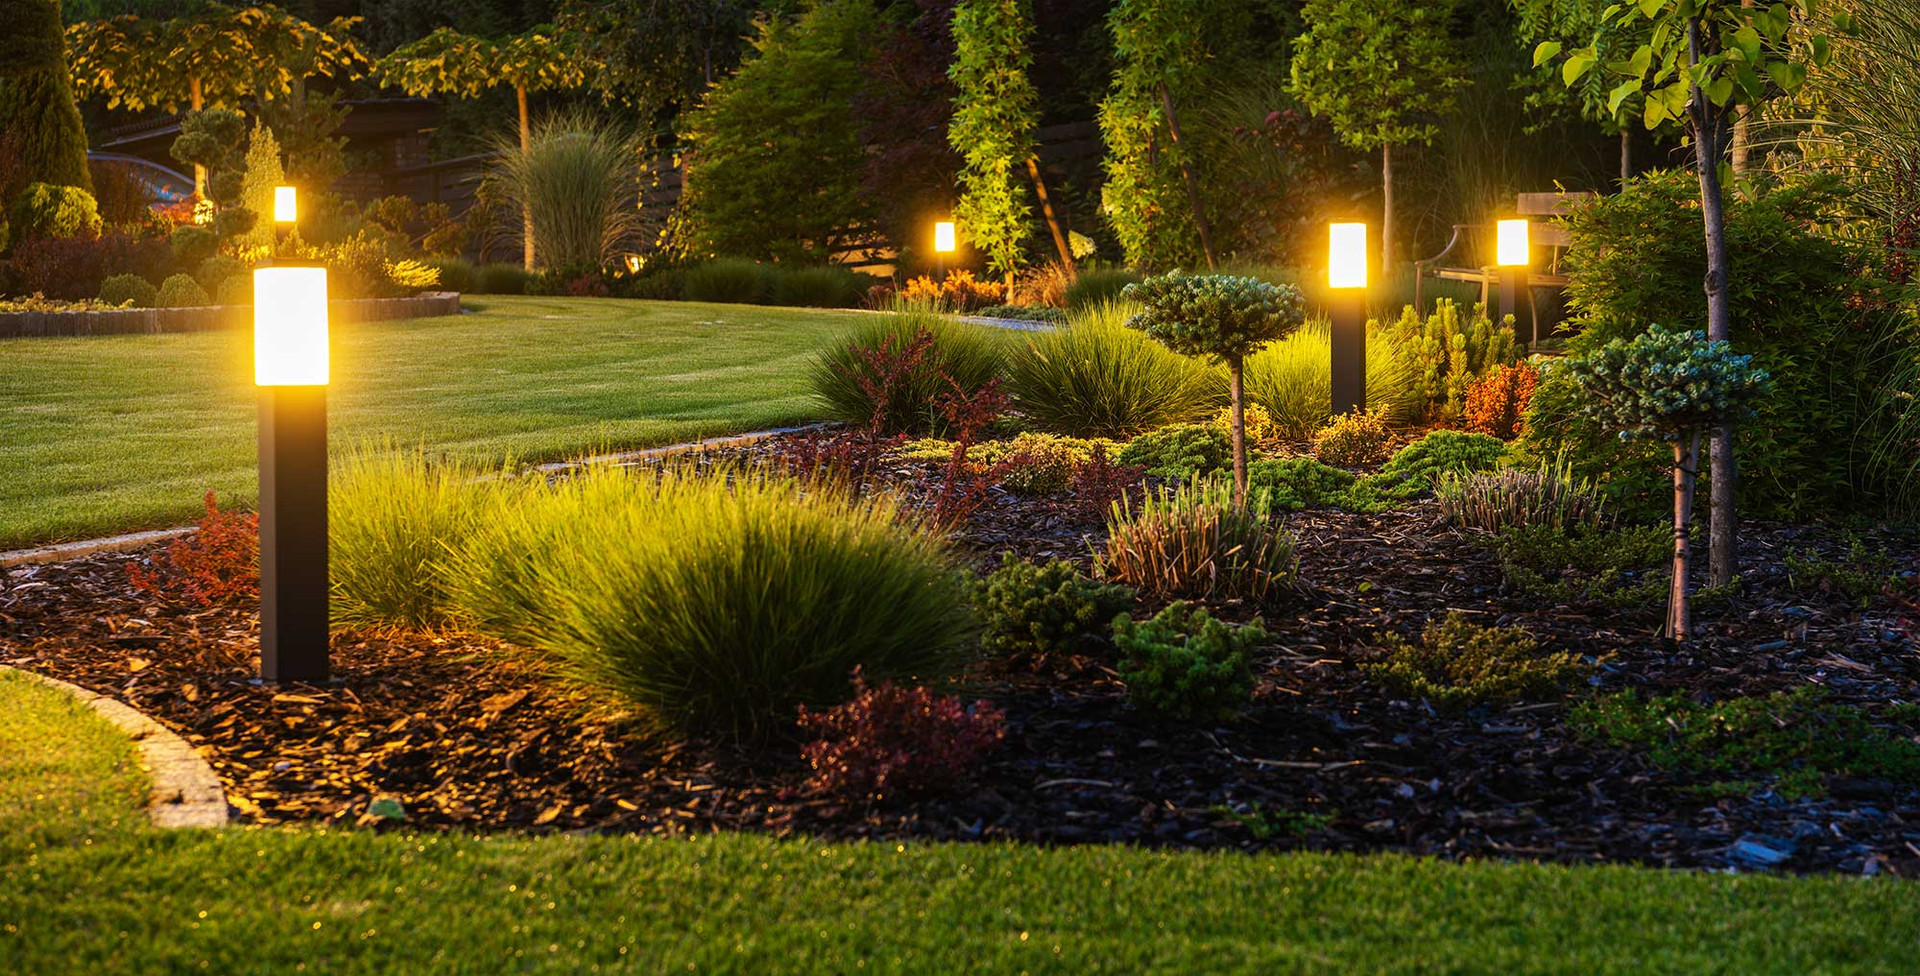
Let's be honest: great landscape lighting isn't about how many fixtures you can cram into your yard. It's about putting the right light in exactly the right spot while leaving enough shadow to create depth and drama. I've seen too many homeowners go overboard, and honestly? It just ends up looking like a runway.
So here's the million-dollar question: how far apart should landscape lights actually be?
For most homes, path lights work well at 6 to 10 feet apart. But if you've got those wider-spread fixtures, you can stretch that to 10–14 feet. Deck lights? Usually 4 to 8 feet apart works great. Steps need enough light that you can clearly see every single change in level no exceptions. And uplights? That completely depends on what you're trying to highlight.
But here's the thing: these numbers are just starting points. The height of your fixtures, how bright they are, the beam spread, where you mount them, nearby plants, and even what surfaces they bounce off of all of that changes what the right distance actually is.
The goal isn't some perfect grid pattern. It's creating a nighttime scene that's safe, elegant, and guides people naturally without making your yard look like a department store at midnight.
Landscape Light Spacing at a Glance
| Application | Recommended starting point |
|---|---|---|
| Standard path lights | 6–10 feet apart |
| Wide-spread path lights | 10–14 feet apart |
| Driveway-edge lights | 8–12 feet apart |
| Outdoor step lights | One per step or level change |
| Deck rail or post lights | 4–6 feet apart |
| Recessed deck lights | 6–8 feet apart |
| Uplights | Based on feature width and beam angle |
Here's something interesting Kichler recommends 10 to 14 feet between many path fixtures to avoid overlighting, while other manufacturers suggest starting around 6 to 8 feet for smaller or lower-output fixtures. So who's right? They both are, actually. It all comes down to what your specific fixture does with light, not some universal number you found online.
Think About the Light, Not Just the Fixtures
I can't tell you how many homeowners I've seen measuring from stake to stake and calling it a day. That's missing the point entirely.
The better question to ask yourself is: Where does the useful light actually start and end?
Two fixtures sitting 8 feet apart can still leave you with dangerous dark spots if they don't put out enough light. Meanwhile, another pair could be 12 feet apart and create way too much overlap if they're tall, bright, and designed to cast light everywhere.
Before you commit to a permanent installation, here's a pro tip: temporarily set up a few fixtures and walk your yard after dark. Look at the ground not the lights themselves. Can you see the edges? The steps? The curves? Can you spot any tripping hazards? Good. But also pay attention to whether your yard feels like it's under interrogation lights. A little shadow isn't a flaw it's what gives planting beds dimension and makes your focal points actually pop.
Too much overlap flattens everything out and creates glare. And nobody wants that.
Path Lights: Getting It Right
For most residential walkways, 6 to 10 feet of path light spacing is where you want to start. Compact solar lights, shorter fixtures, and lower-output LEDs should be on the closer end. Taller fixtures with wide hats or engineered optics can stretch out to 10–14 feet.
If you're looking for reliable options, the Liberty LBE-649 path light offers a medium-sized profile with a beautiful weathered brass finish that works well in traditional settings. For smaller walkways or tighter spaces, the Liberty LBE-650 path light is a great choice; its compact size fits neatly along narrower paths without overwhelming the space. And when you need something larger with more presence, the Liberty LBE-27 large path light delivers broader coverage and a more substantial look.
Remember how Kichler recommends 10–14 feet? And VOLT suggests around 6–8 feet for their solar path lights? They're not fighting; they're just working with different equipment. Always check your manufacturer's recommendations when they provide them. Then and I can't stress this enough test at least three fixtures after dark. Three lights will show you the rhythm and overlap of your layout way better than one ever could.
How Close Should Path Lights Be to a Walkway?
Start with 12 to 18 inches from the walkway edge. This gives you enough room to illuminate the surface while keeping fixtures out of the way of people, strollers, lawn equipment, and wheelbarrows.
FX Luminaire's training uses the same 12-to-18-inch range. But don't be afraid to adjust. Push them farther away if you've got dense plants, a broad light distribution, or need more maintenance clearance. Pull them closer if the fixture is short or narrowly shielded.
The key thing? The light source itself should stay below normal eye level and cast light downward toward the ground. A visible, glaring lamp actually makes a path harder not easier to navigate. Trust me on this one.
Should Path Lights Be on Both Sides?
Not necessarily. In fact, the most refined approach is usually a staggered pattern alternating lights from one side to the other.
FX Luminaire recommends staggering path fixtures with even spacing for both useful light and visual interest. Kichler agrees, noting that while alternating sides works great, a one-sided layout can save you money on installation.
Just avoid putting matching fixtures directly across from each other unless your architecture demands formal symmetry. Parallel rows can make a garden path look like an airport runway and not in a good way.
Use both sides when your walkway is unusually wide, when plants block light from one side, or when the path has sharp bends and elevation changes. For most narrow residential paths? A staggered arrangement is all you need.
How Many Path Lights Do I Actually Need?
Here's a simple formula that works:
Approximate fixture count = walkway length ÷ desired spacing
So a 40-foot walkway at 8-foot spacing would need about five lights. A 60-foot walkway at 10-foot spacing would need about six.
But here's the catch treat that number as a planning estimate, not a purchase order. Your first and last fixtures need to support the beginning and end of the route. VOLT specifically recommends positioning lights near both transition points, and I couldn't agree more.
Curves, gates, intersections, steps, and sudden changes in paving might require an extra light even if the distances become less uniform. Don't be afraid to adjust your eyes after dark will tell you what's right.
Driveway Lighting: A Different Animal
For low-level fixtures along a residential driveway, start at approximately 8 to 12 feet apart. Compact fixtures might need 6–8 feet, while broad-spread models can work farther apart.
Tighten the spacing near curves, gates, retaining walls, parking areas, and pedestrian crossings. Driveway lighting should guide movement without competing with headlights.
Aim that light downward. Shield the source from approaching drivers. Place fixtures far enough from the pavement that they won't get hit by tires, doors, delivery vehicles, or maintenance equipment.
And please don't assume both edges need continuous rows. A staggered layout can define the route with fewer fixtures and a softer effect. For long driveways, downlighting from trees or structures can provide broader coverage. VOLT gives an example of four downlights spaced 20 feet apart along an 80-foot driveway. That might sound far apart, but from up high, it works beautifully.
Near the house, concentrate light where drivers become pedestrians. The best outdoor light spacing changes as the purpose of the space changes.
Step Lights: Safety First
Steps are different from ordinary paths because safety is absolutely paramount. The priority is making every elevation change unmistakably clear.
Whenever practical, install at least one light for every step or riser. Schneider Electric's guidance recommends this as a general rule, and it's one I stick to religiously.
For wider staircases, you'll want fixtures that can handle the span. The Liberty LBE-303 large integrated LED step light provides excellent coverage across broader steps, while the Liberty LBE-304 small integrated LED step light is perfect for narrower treads or when you prefer a more discreet fixture. Both offer integrated LEDs and that durable weathered brass finish that holds up beautifully outdoors.
For wide stairs, one central fixture isn't enough to illuminate the full tread. Add lights roughly every 3 to 4 feet across the width, or place one near each side.
Every-other-riser spacing can work on short flights but only when each tread edge remains clearly visible. Keep the fixtures low, shielded, and consistent in brightness. The lamp should illuminate the tread without shining into the eyes of someone approaching.
Lighting experts emphasize that each level change should be defined uniformly and without harsh glare. I've seen too many step installations where the light hits you right in the eyes as you're walking up. Don't be that person.
Deck Lighting: Creating Ambiance
A useful starting range for deck lighting is 4 to 8 feet apart, depending on the fixture.
Rail and Post Lights
Place rail or post lights around 4 to 6 feet apart, or align them with existing structural posts. Alignment generally looks more intentional than forcing a separate mathematical grid.
The light should fall downward onto the deck rather than horizontally into seated guests' eyes. The Liberty LBE-2236 cast aluminum deck light in white offers a clean, modern look, while the LBE-2236 cast brass deck light brings warmth and durability in a traditional finish. For a darker aesthetic, the LBE-2236-BK aluminum deck light blends seamlessly into darker decking or shaded areas.
Trex describes rail lights as indirect fixtures designed to illuminate the surface below and improve visibility. That's exactly what you want: light where you need it, not in your face while you're trying to enjoy a glass of wine.
Recessed Deck Lights
Start around 6 to 8 feet apart along primary routes. Use closer spacing near doors, stairs, deck edges, and changes in level.
Recessed lights are excellent for tracing movement, but too many produce a dotted runway effect. Trex notes that flush-mounted deck lights can guide people and make the deck surface and edges easier to see. Just don't go overboard.
Deck Stair Lights
Illuminate each tread or every level change whenever possible. A sophisticated deck uses layers: low lights for movement, post or rail lights for gentle ambient illumination, and targeted task lighting near doors, grills, or dining areas.
Uplights: Quality Over Quantity
Here's where things get interesting. Uplights should never be distributed at equal intervals. They should be assigned to features you actually want to show off.
One uplight might be plenty for a narrow column, young tree, or slender palm. A broad mature tree might need two or three fixtures positioned at different angles to reveal both the trunk and canopy. A wide façade might need several beams, but each should correspond to a column, arch, bay, or material change.
Match the beam to the subject:
- Narrow beams suit tall, slender trees and columns
- Medium beams suit small trees and architectural details
- Wide floods suit broad canopies, textured walls, and large planting areas
For targeted accenting, the Liberty LBE-17 bullet light delivers a focused narrow beam perfect for drawing attention to specific architectural details or slender trees. The LBE-15 bullet light offers similar precision in a slightly different configuration. For broader coverage of walls, large shrubs, or textured surfaces, the Liberty LBE-13 oval flood light casts a wider, more diffused beam. And for large-scale landscape features or expansive façades, the LBE-19 large flood light with clear glass delivers serious illumination.
When you need to highlight ground-level features like trees, columns, or signage from below, the Liberty LBE-201 well light provides a clean, recessed look. For even more precise control or when you want to avoid spill light, the LBE-202 well light and LBE-203 well light with louver cover offer additional beam-shaping options.
Kichler explains that beam diameter increases with distance and suggests a 35-degree beam as a versatile starting point. FX Luminaire illustrates the range with 20-degree spot, 35-degree flood, and 60-degree wide-flood options.
Move a fixture close to a narrow feature for concentrated drama. Move it farther away when the beam needs to widen. Always check whether branches, shrubs, or rooflines block the light.
How Beam Spread Changes Everything
Beam spread is one of the main reasons generic spacing rules fail. Here's why:
At a throw distance of 10 feet, the approximate beam diameter is:
- A 20-degree beam: 3.5 feet
- A 35-degree beam: 6.3 feet
- A 60-degree beam: 11.5 feet
Now, the usable edge will be dimmer than the center, so these numbers aren't fixture-spacing instructions. They simply show how dramatically beam angle changes coverage. A wider beam covers more area but distributes the available light more broadly. A narrow beam creates stronger, longer-reaching emphasis over a smaller width.
Expert guidance likewise notes that, with the same lumen output, a wider beam won't project as far as a narrower one. Brightness and beam angle must therefore be considered together.
What About Bulbs and Power?
The fixture is only half the story. The right bulb makes all the difference in achieving the spacing and coverage you're after.
For path lights, step lights, and general accenting, the LBE 2.5-watt LED silicon single contact bulb provides reliable, energy-efficient performance. When you need a wider flood pattern, the MR11 flood bulb in the same 2.5-watt configuration is a solid choice. For smaller fixtures like compact step lights or accent pieces, the 1.5-watt LED silicon wedge bulb offers a lower output that won't overpower tight spaces. Similarly, the G4 bulb provides that same 1.5-watt efficiency in a different base configuration.
For more demanding applications where you need serious light output, the TPC LED 6.5W MR16 flood bulb in 5000K delivers bright, crisp illumination perfect for uplights or large flood fixtures. And the 6-watt LED MR16 flood bulb gives you that same higher output with a slightly different beam profile.
Of course, all these fixtures need proper power. A reliable Liberty low-voltage landscape transformer ensures your entire system runs safely and consistently. And when it comes to making secure, weatherproof connections, Liberty dry crimp filled connectors give you peace of mind that your installation will hold up season after season.
Should Landscape Lights Be Evenly Spaced?
They should feel balanced, but they don't need to be mathematically identical.
Consistent spacing suits straight formal paths, retaining walls, and deck rails. But naturalistic landscapes look better when the layout responds to the site.
A curve might need an extra fixture. A dense shrub might force a change. A beautiful tree might deserve emphasis, while an empty section of lawn might need no light at all.
Think in terms of visual rhythm, not ruler-perfect repetition. Keep the rhythm steady where the same task repeats, then adjust deliberately around steps, curves, gates, focal points, and obstructing plants.
Common Landscape Lighting Spacing Mistakes
Installing Too Many Fixtures
Excessive brightness removes contrast, flattens the garden, and makes individual features less memorable. More lights don't automatically create a safer or more attractive property often, it's quite the opposite.
Leaving Dark Gaps
Pools of light don't need to overlap completely, but they should create a clear visual route. Dark gaps become especially problematic near path edges, steps, and changes in direction.
Ignoring Plant Growth
A fixture that works perfectly in spring may disappear behind mature foliage by midsummer. Consider the eventual height and spread of surrounding plants before fixing each position.
Exposing the Light Source
A technically correct layout can still feel uncomfortable when the lamp is visible. Use caps, louvers, shields, and careful aiming so people notice the effect not the fixture.
Skipping the Nighttime Test
A paper plan can't fully predict how stone, foliage, water, gravel, and paving will reflect light. Temporarily place and connect fixtures before completing the final installation. I've learned this lesson the hard way more than once.
The Bottom Line
Start path lights 6 to 10 feet apart, or 10 to 14 feet apart for suitable wide-spread fixtures. Place driveway lights roughly 8 to 12 feet apart. Illuminate every outdoor step or level change whenever possible. Space most deck lights 4 to 8 feet apart, depending on their type. Position uplights according to the feature and beam angle, not a fixed interval.
Then test the layout after dark. Walk the space. Adjust. Test again.
The finest landscape lighting doesn't announce how many fixtures were installed. It quietly leads people home, reveals the architecture, and lets the garden keep a little mystery. And honestly? That's exactly the kind of yard you want to come home to.
Frequently Asked Questions
How far apart should landscape lights be?
Most residential landscape lights begin 6 to 10 feet apart, while broad-spread path fixtures may work at 10 to 14 feet. The final distance depends on beam spread, lumen output, mounting height, and the purpose of each fixture.
How far apart should path lights be placed?
Start with 6 to 10 feet between path lights. Use closer spacing for small, dim, or short fixtures and wider spacing for taller lights with broader optics. The Liberty LBE-650 and LBE-649 are excellent choices for most residential paths.
How many path lights do I need for a walkway?
Divide the walkway length by the intended spacing, round up, and adjust for the beginning, end, curves, and steps. A 40-foot path at 8-foot spacing will usually need about five lights.
Should path lights be placed on both sides of a walkway?
They can be, but they don't have to be. Alternating fixtures from side to side usually creates a more natural effect and avoids the runway appearance of matching parallel rows.
How far apart should landscape lights be around a driveway?
Begin around 8 to 12 feet apart for driveway-edge lights. Tighten the spacing near curves, gates, parking areas, and places where drivers become pedestrians.
How far apart should outdoor step lights be?
Ideally, provide one light for every step or elevation change. On wide stairs, add fixtures approximately every 3 to 4 feet across the width. The Liberty LBE-303 and LBE-304 step lights are designed specifically for this application.
How far apart should deck lights be spaced?
Deck rail and post lights commonly begin at 4 to 6 feet apart. Recessed deck lights often begin at 6 to 8 feet, with closer spacing near stairs, doors, and edges.
Should landscape lights be evenly spaced?
Landscape lights should look balanced, but exact spacing is unnecessary. Adjust the layout for curves, plants, steps, focal points, and changes in how the area is used.
How close should path lights be to a walkway?
Place path lights approximately 12 to 18 inches from the walkway edge as a starting point. Adjust for fixture height, beam width, nearby plants, and maintenance clearance.
How does beam spread affect landscape-light spacing?
A wider beam covers more area and may permit wider spacing, but its light is distributed more broadly. A narrow beam reaches farther and creates stronger emphasis over a smaller area.


