Recessed Lighting 101: Everything You Need to Know Before Installing
If you have been searching to brighten up your home without taking up more space, look no further than recessed lighting. In this guide, you will learn about the benefits and upgrades recessed lighting can bring to your home.
What is Recessed Lighting?
But first, what is recessed lighting? Let's dive into some facts so you know what you’re getting into first. Instead of turning to a new lamp or a bulky chandelier that will likely cost a fortune, recessed lighting is an alternative option that offers prime lighting without taking up more space. These lights are sunken straight into the ceiling, with only the trim peaking out. They offer a minimalist look to any room, as the bulbs are barely visible, offering a nice glow to the room. They are perfect if you want that sleek look and don’t want to make the room look too cluttered with overhead lighting.
While they may look nice, what are some other benefits of recessed lighting? For starters, these lights are customizable to your liking. The trim doesn’t match the baseboards? That can easily be changed to match the vibes of the room. You are also in control of which bulbs go in, giving you the freedom to pick how vibrant the lighting will be in any given room. Many of these lights come with the option to dim as well. If you are indecisive about how bright you want a room to be, you can have the option to switch the settings as you please.
A feature that is really helpful with recessed lights is the ability to place them wherever you please. On any given ceiling, you can choose how many lights there are going to be. Too many shadows in one corner? Nothing a good light can’t fix. They can be used as spotlights, perhaps if you are looking to accentuate an art piece or want extra lighting on the dining room table? There are so many options available for how you can place the lights.
Still wondering if these the lights for you? Here are some things that might help you make your decision:
- You don’t want too many lights installed in one area. This will give the effects of a hospital, and that harsh lighting is not easy on the eyes. You are in control of where your lights will go, as well as how many.
- Since you are in control of the placement, there is minimal room for error on what the lighting will look like.
- You are also given a variety of different bulbs to choose from. Many people choose LEDs as they often last longer over longer periods. You can choose cool-toned bulbs or opt for a warmer look. You are in control!
Recessed Lighting Tips
Once you’re comfortable with the decision of installing recessed lighting, here are some tips that may help if you feel bold enough to install them yourself.
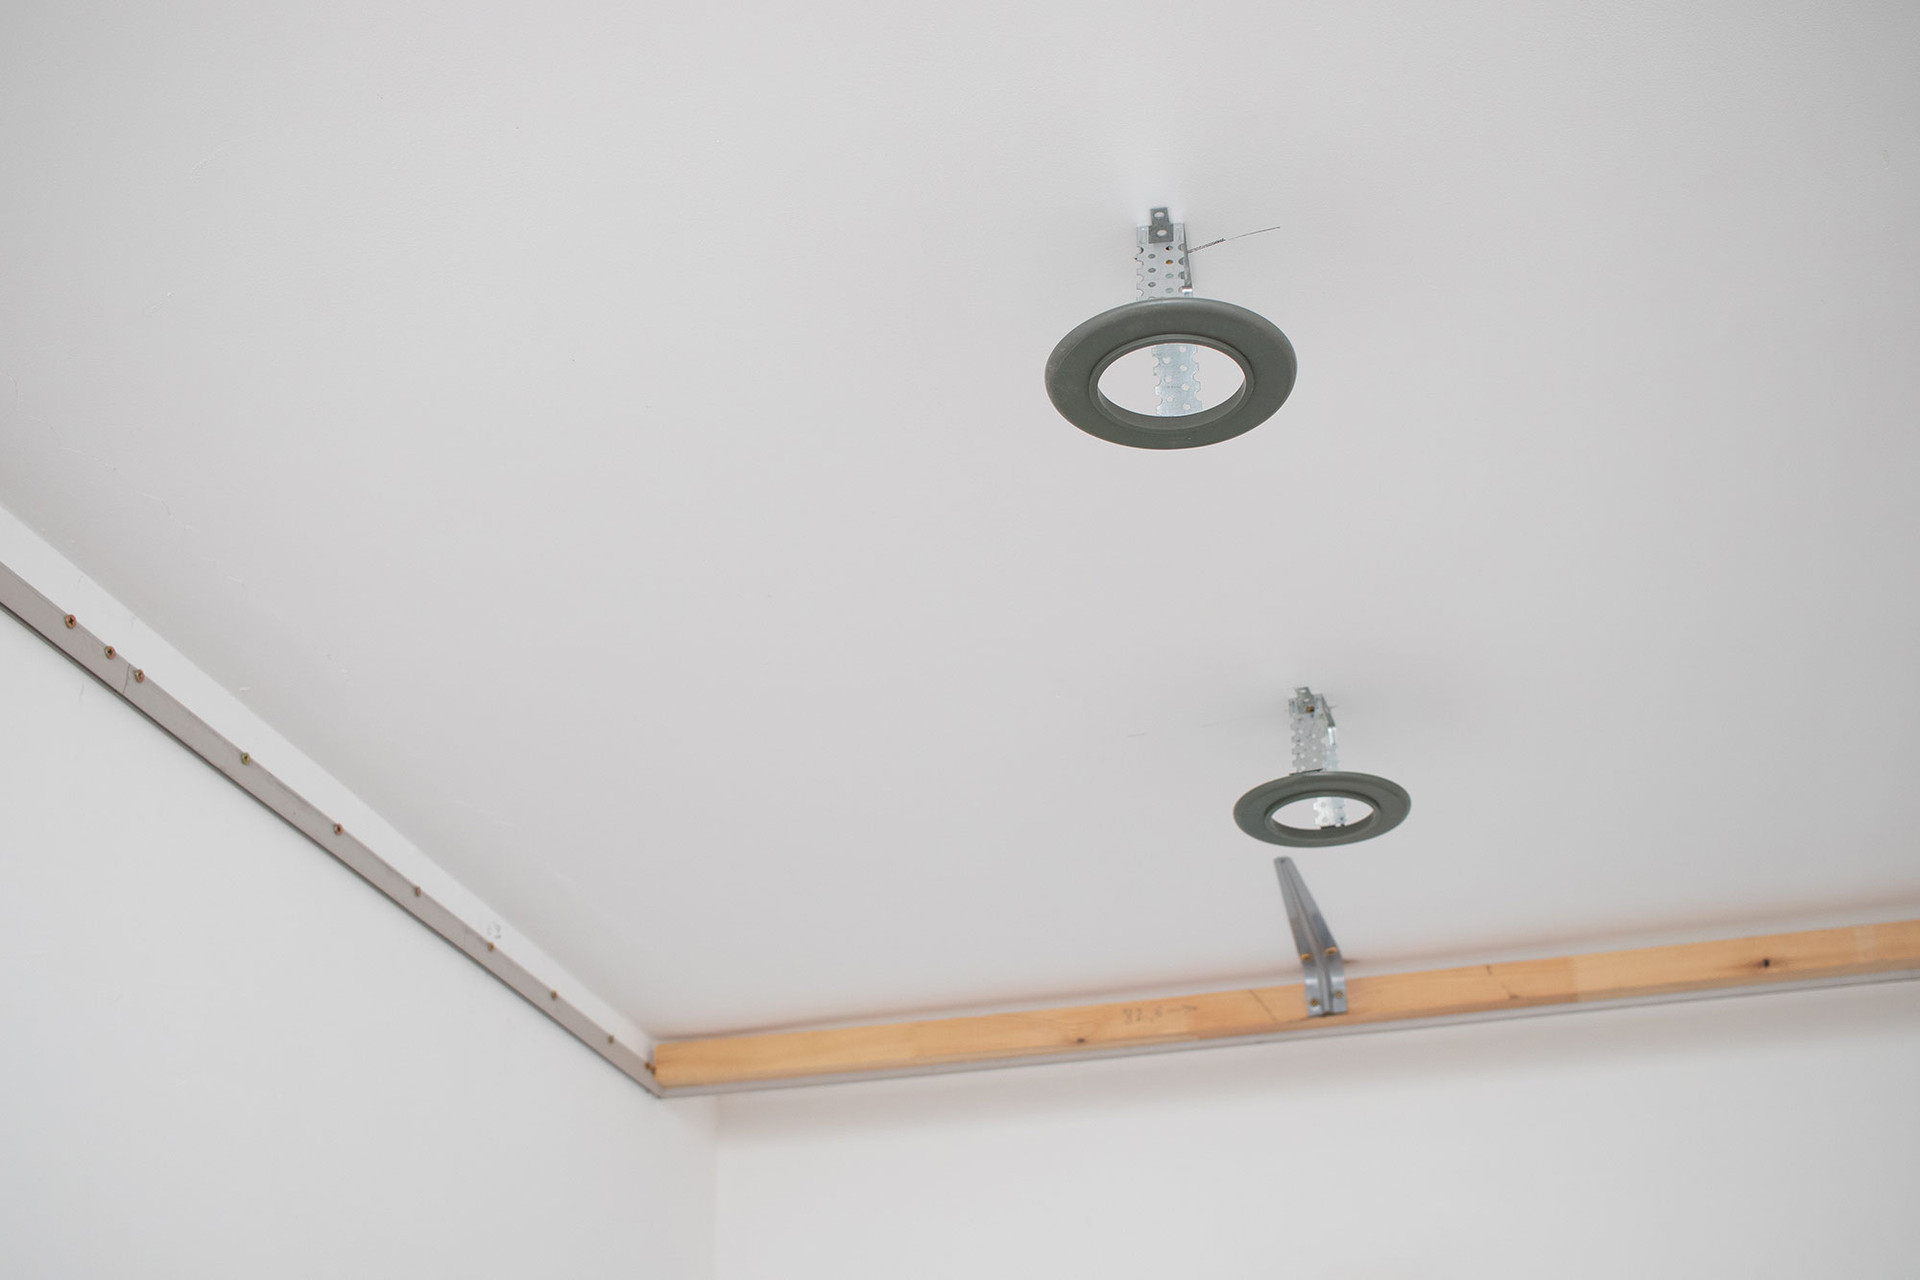
The first, and probably most important step is to make sure the power is off. Flip the breaker off and even double-check to ensure it is shut off. You don’t want anyone to get harmed during this installation process. Next, trace out where the lights will go on the ceiling. Most recessed lighting kits include a guide on what to trace, so use the provided materials to make sure everything is perfect. You can always trace freehand, but there is nothing nicer than a sleek and polished look. Once the area has been traced out, carefully trace the ceiling where the lights are going to go. Don’t be afraid to take your time with this part, you want the look to be as clean as possible.
When you reach the wiring part of the job, you are just matching the wires to the same color wires. Black to black, white to white; pretty straightforward. It is recommended to have some experience beforehand, but it is very simple to understand. Once the wires are connected, secure the housing, and pop the trim in. After everything has been set and secured, you can now screw in the bulbs. When you are sure everything is set up and in place, turn the breaker back on and see the effect of your handiwork. If everything goes correctly, your room should be filled with new and improved lighting.
Recessed Lighting is the way to go!
Done right, recessed lighting can really spruce up your area. Customize them to your liking, and enjoy that hidden light look in any room. You don’t need to worry about anyone hitting their heads on low-hanging lights, and can enjoy your room knowing the lights have been tailored to your liking. These lights are definitely recommended when renovating a room or if you are simply looking to spice up an area.
1. What is recessed lighting?
Answer:
Recessed lighting, also known as downlights or can lights, is a fixture installed into a hollow ceiling opening so that only the trim and bulb are visible from below. It offers a sleek, minimalist appearance that doesn’t clutter your space. (Cans & Fans, Wikipedia)
2. What are the key components of recessed lighting?
Answer:
Three main parts make up a recessed lighting fixture:
- Housing (can): Hidden above the ceiling, it contains wiring and components.
- Trim: The visible ring or frame around the bulb—available in various styles.
- Bulb: Can be LED, incandescent, halogen, or fluorescent.
3. What types of recessed lighting are available?
Answer:
Key types include:
- IC-rated vs. Non-IC: IC-rated fixtures can safely contact ceiling insulation; non-IC require clearance.
- New construction vs. remodel housings: New construction is for open-frame installation, while remodel housings fit into existing ceilings.
4. What size should I choose for recessed lights?
Answer:
Common sizes are 4", 5", and 6". Smaller (2–3") fixtures work well for accenting, while larger sizes are ideal for ambient or task lighting.
5. How far apart should recessed lights be placed?
Answer:
General spacing guidelines:
- For 4" lights: ~4 ft apart.
- For 6" lights: ~6 ft apart.
Also, Home Depot suggests dividing your ceiling height by two to determine spacing for even lighting.
6. Which type of bulb is best?
Answer:
LED bulbs are the preferred choice they are energy-efficient, long-lasting, emit less heat, and come in various color temperatures and dimmable options.
7. How do I plan the layout for lighting?
Answer:
Start by flipping the breaker off for safety. Trace desired placement on the ceiling (using templates if available), then cut holes, connect wiring (black to black, white to white), secure housing, insert trim, install bulbs, and test by turning power back on.
8. What is the average installation cost?
Answer:
DIY installation can save on labor costs. However, hiring a professional may cost $100–$200 per light or more. Higher-end sources cite $300–$500 per fixture depending on complexity and region.
9. Are there risks or downsides to recessed lighting?
Answer:
Yes. Improper installation can cause energy loss, fire hazards, or ice dams. Additionally, spacing too many lights can result in a harsh or hospital-like look.
10. How can I enhance lighting without replacing fixtures?
Answer:
Instead of major renovations, consider:
- LED retrofit trims: Fit into existing cans and offer adjustable brightness and color temperature (recommended ≤3000K for kitchens).
Layered lighting: Add under-cabinet, pendants, task lights, or incorporate dimmers to balance light and reduce harshness.


